

Think cobbler is just fruit under biscuits? Think again.
This rustic apple cobbler with cinnamon streusel trades that old idea for warm, cinnamon-spiced apples and a golden, buttery crumb that bakes crisp and jammy.
It uses five apples, a pourable batter, and a quick streusel so you can get bakery-style flavor in one pan without fuss.
By the end you’ll know how to get bubbling fruit, golden edges, and a steamy scoop-ready dessert every time.
Complete Rustic Apple Cobbler Recipe With Cinnamon Streusel

This rustic apple cobbler brings together warm, cinnamon-spiced apples and a golden, buttery streusel that bakes up crisp and sweet. The filling uses 5 medium apples peeled and sliced, tossed with 1/2 cup brown sugar and 2 teaspoons cinnamon, then baked in 6 tablespoons melted butter until bubbly. The cake-like batter combines 1 cup all-purpose flour, 1/2 cup white sugar, 2 teaspoons baking powder, and 3/4 cup milk, poured over the apples before the final bake. For the optional cinnamon streusel, mix 1/2 cup brown sugar, 1/2 cup flour, 1/2 teaspoon cinnamon, and 4 tablespoons cold butter until crumbly, then sprinkle over the batter.
You’ll need a 2.5-quart oval baking dish or a 13 x 9-inch pan. Preheat your oven to 350°F. The entire bake happens in stages: melt the butter in the dish for about 3 minutes, add the apple mixture and bake for 10 minutes, pour the batter over the apples, sprinkle the streusel on top, and bake the assembled cobbler for 40 to 45 minutes. The topping should turn golden with a few deeper brown spots. The filling should bubble at the center, not just around the edges. Let the cobbler cool for 15 minutes before serving so the juices thicken slightly.
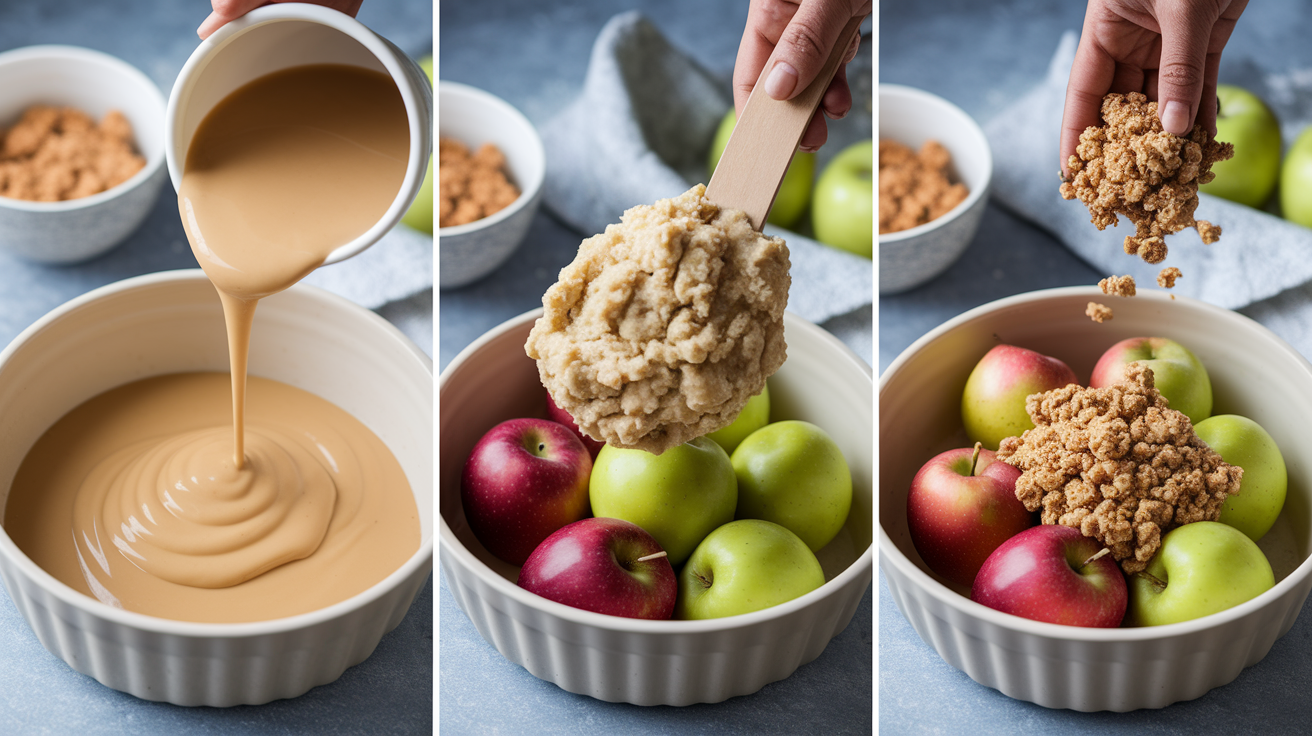
Here’s the complete step-by-step process:
-
Preheat the oven to 350°F and place 6 tablespoons butter in your baking dish. Slide the dish into the oven for about 3 minutes, just until the butter melts.
-
While the butter melts, peel, core, and slice 5 medium apples into medium-thin slices, around 1 inch thick. Toss the apples with 1/2 cup brown sugar, 2 teaspoons cinnamon, and 1 teaspoon vanilla extract. Pour the apple mixture into the melted butter and bake for 10 minutes.
-
In a mixing bowl, whisk together 1 cup all-purpose flour, 1/2 cup white sugar, 2 teaspoons baking powder, and a pinch of salt. Stir in 3/4 cup milk until the batter’s smooth and pourable.
-
Remove the dish from the oven and pour the batter evenly over the hot apples. The batter will spread and start to set as it meets the heat.
-
In a small bowl, combine 1/2 cup brown sugar, 1/2 cup flour, 1/2 teaspoon cinnamon, and 4 tablespoons cold butter. Use your fingers or a fork to rub the butter into the dry ingredients until the mixture looks like coarse crumbs. Sprinkle this streusel evenly over the batter.
-
Bake for 40 to 45 minutes, until the topping’s golden and the filling bubbles in the center. Let the cobbler rest for 15 minutes before scooping.
Serve this cobbler warm with a scoop of vanilla ice cream melting into the jammy fruit and crisp topping.
Apple Choices That Perfect the Rustic Cobbler Texture

The apple variety you choose changes how your cobbler bakes. Granny Smith apples are tart and hold their shape beautifully, making them the go-to choice for most bakers. Jazz apples stay extra firm and add a tangy-sweet bite that stands up to the cinnamon and sugar. Honeycrisp apples bring serious juice, which is wonderful for flavor but can make your filling watery, so add about 2 tablespoons extra flour to the apple mixture if you use them. Envy apples are naturally sweet and crisp, so you might want to cut back on the added sugar by about 1/8 cup to keep the cobbler from tasting too sugary.
Slice your apples to a medium-thin thickness, around 1 inch, so they soften during baking without turning to mush. Avoid Macintosh, Gala, and Red Delicious apples for this recipe. They break down too quickly and turn the filling into applesauce instead of tender, distinct slices. Mixing two varieties, like pairing tart Granny Smith with sweet Honeycrisp, gives you balanced flavor and reliable texture.
Granny Smith – tart, firm, bakes evenly with no extra adjustments needed
Jazz – tangy-sweet and extra firm, holds shape beautifully in longer bakes
Honeycrisp – very juicy and flavorful, add 2 tablespoons extra flour to prevent watery filling
Envy – sweet and crisp, reduce added sugar by 1/8 cup to balance sweetness
Golden Delicious – mild and soft, best mixed with a tart variety like Granny Smith for balance
Advanced Flavor Customization for Spiced Apple Filling

Once you’ve got the base cobbler down, you can layer in deeper flavor by upgrading the filling. Try reducing 1/2 cup apple cider in a small saucepan until it thickens to about 2 tablespoons, then stir it into the apple mixture for a concentrated apple punch. Add 1/4 teaspoon nutmeg, 1/4 teaspoon allspice, or a pinch of ground ginger alongside the cinnamon to build a warmer, more complex spice profile. These small additions make the filling taste like it simmered for hours, even though the prep stays quick.
Sweetness adjustments matter when you’re working with naturally sweet apples like Envy or Fuji. Drop the brown sugar by a tablespoon or two, or swap half of it for white sugar if you want a cleaner, less molasses-heavy sweetness. Lemon juice isn’t optional if you want balanced flavor. One tablespoon brightens the filling and keeps the apples from tasting flat.
If your filling turns out watery, the usual culprits are juicy apples, skipping the flour or cornstarch, or an oven that runs cool. Use an oven thermometer to confirm your oven actually reaches 350°F. Preventing a watery filling starts with balancing moisture before you bake. If your apples release a lot of juice during prep, toss them with 1 tablespoon of flour or cornstarch along with the sugar and spices. This thickens the juices as the cobbler bakes, so you get thick, jammy fruit instead of fruit soup.
| Ingredient | Purpose | Adjustments |
|---|---|---|
| Apple cider reduction | Concentrates apple flavor | Reduce 1/2 cup cider to 2 Tbsp; stir into apples |
| Nutmeg, allspice, ginger | Adds warmth and complexity | Use 1/4 tsp each; adjust to taste |
| Lemon juice | Balances sweetness and brightens flavor | 1 Tbsp minimum; add up to 2 Tbsp for very sweet apples |
Cinnamon Streusel Variations and Texture Techniques

The base streusel recipe gives you a simple, sweet crumb topping, but you can customize it to match your texture and flavor preferences. Swap half the flour for old-fashioned rolled oats to add chew and a heartier bite. Just pulse the oats a few times in a food processor if you want smaller pieces that blend into the topping. Chopped pecans or walnuts, about 1/4 cup, mixed into the streusel add a nutty crunch and make the topping feel more special. For a spicier streusel, increase the cinnamon to 1 teaspoon or add a pinch of cardamom or ginger.
Brown sugar makes the streusel taste like caramel as it bakes, but you can use half white sugar if you want a lighter, less molasses-forward sweetness. The key to good streusel texture is cold butter. If the butter warms up, the mixture turns greasy instead of crumbly. Work quickly and use your fingertips or a pastry cutter to break the butter into pea-sized pieces.
Food Processor vs. Hand-Mixed Streusel
A food processor makes finer, more uniform crumbs that bake into an even, sandy topping. Pulse the dry ingredients and cold butter together in short bursts until the mixture looks like coarse sand. This method’s fast and consistent, and it works well when you want a streusel that melts into the batter slightly as it bakes. Hand-mixing with a fork or your fingers gives you chunkier, irregular crumbs that stay more distinct and create pockets of buttery crunch. This rustic texture looks homemade and lets you control the crumb size more easily. Squeeze some of the mixture into larger clumps for extra crispy bits on top.
Comparing Rustic Cobbler Topping Styles
The streusel topping’s just one option. A classic pourable batter, like the one in this recipe, bakes up light and cake-like, with a soft crumb that soaks up some of the fruit juice. It spreads evenly over the apples and puffs as it bakes, creating a golden, slightly crisp top layer. This style’s the easiest to assemble and works well when you want a cobbler that slices neatly. The batter’s egg-free, so it stays tender without turning dense or rubbery.
Biscuit-style cobbler uses a shaggy dough that you drop in spoonfuls over the apples, leaving gaps where the fruit peeks through. The dough bakes into fluffy, flaky biscuits with crisp edges and soft centers. This method feels more rustic and gives you contrast… fruit, crisp edges, and tender dough all in one scoop. It takes a bit more hands-on mixing, and the cobbler won’t slice as cleanly, but the homestyle look’s unbeatable. You can also shape the dough into freeform pieces and scatter them over the apples for an even more rustic, uneven topping that bakes up with lots of golden, crunchy spots.
Adding coarse sugar, like demerara or sparkling sugar, on top of any of these styles gives you extra crunch and a bakery-style finish. Sprinkle it over the batter, biscuit dough, or streusel just before baking.
Pourable batter – quick, smooth, cake-like; slices neatly; minimal hands-on work
Biscuit-style dough – fluffy, flaky, rustic appearance; more texture contrast; requires shaping and dropping spoonfuls
Freeform rustic pieces – uneven, homestyle look; lots of crispy edges; best for casual, family-style serving
Streusel topping – buttery, crumbly, sweet crunch; easiest to sprinkle; can be mixed with oats or nuts
Cast Iron and Baking Dish Tips for Rustic Apple Cobbler Success

A 2.5-quart oval baking dish or a 13 x 9-inch pan both work well for this cobbler. The oval dish gives you a deeper layer of apples and a thicker topping, while the 13 x 9 pan spreads everything out for more surface area and extra crispy edges. Cast iron skillets are another great option. They hold heat evenly and give the bottom and edges a golden, slightly caramelized crust. Preheat the cast iron with the butter already in it, then add the apples and continue with the recipe as written.
Melting the butter directly in the baking dish for about 3 minutes saves a step and coats the bottom of the pan so the apples don’t stick. Place a flat baking sheet on the rack below your cobbler to catch any drips or overflow as the filling bubbles. If you’re using a smaller or deeper dish, your cobbler may need an extra 5 to 10 minutes of baking time. Check for doneness by looking for bubbling in the center of the filling and a golden topping with a few deeper brown spots.
| Pan Type | Adjustment | Reason |
|---|---|---|
| 13 x 9-inch pan | Standard bake time (40–45 minutes) | Spreads filling thin; more crispy topping surface |
| 2.5-quart oval dish | Check at 45 minutes; may need up to 50 minutes | Deeper filling takes longer to bubble in center |
| Cast iron skillet | Preheat skillet with butter; bake as directed | Even heat; caramelized bottom crust; rustic presentation |
Serving Rustic Apple Cobbler the Classic Way

Let the cobbler cool for 15 minutes after you pull it from the oven. This short rest gives the filling time to thicken so it doesn’t run all over the plate when you scoop. Serve it warm, not hot, so the topping stays crisp and the filling’s thick enough to hold its shape. A scoop of vanilla ice cream melting into the warm apples and buttery streusel is the classic move. The cold ice cream meeting the warm cobbler creates the perfect contrast of temperature and texture.
Whipped cream’s a lighter, fluffier option that doesn’t compete with the cobbler’s sweetness. Dust the top with a pinch of ground cinnamon or drizzle with salted caramel for extra indulgence. If you want to serve this at a gathering, plate individual portions in shallow bowls so the juices pool around the cobbler, and add the toppings at the table so everyone can customize their own.
Vanilla ice cream – classic pairing, melts into the warm filling
Lightly sweetened whipped cream – airy, less sweet, balances the richness
Salted caramel drizzle – adds a sweet-salty kick and extra shine
Dusting of ground cinnamon – simple, aromatic finish
Vanilla yogurt – tangy, creamy, lighter alternative for breakfast or brunch
Make-Ahead, Storage, and Reheating Instructions for Cobbler

You can prep the apple filling up to 24 hours ahead and keep it refrigerated in a covered container. When you’re ready to bake, pour the cold filling into your prepared dish, top with the batter and streusel, and bake as directed. The cold filling may add a few extra minutes to the total bake time, so watch for bubbling in the center. Baked cobbler reheats beautifully. Place the whole dish in a 350°F oven for 10 to 15 minutes, or microwave individual portions for 30 to 60 seconds.
Leftovers last 3 to 4 days in the refrigerator when stored covered. The topping softens as it sits, but reheating crisps it back up. For longer storage, freeze baked cobbler in an airtight container or wrapped tightly in foil for up to 3 months. Thaw overnight in the fridge, then rewarm before serving. Cobbler-night can happen on a weeknight when you prep the filling over the weekend and bake fresh in under an hour.
Refrigerate unbaked apple filling up to 24 hours; assemble and bake when ready
Reheat baked cobbler at 350°F for 10 to 15 minutes to restore crispness
Store leftovers covered in the fridge for 3 to 4 days
Freeze baked cobbler up to 3 months; thaw in fridge and rewarm before serving
Rustic Cobbler Troubleshooting and Common Fixes
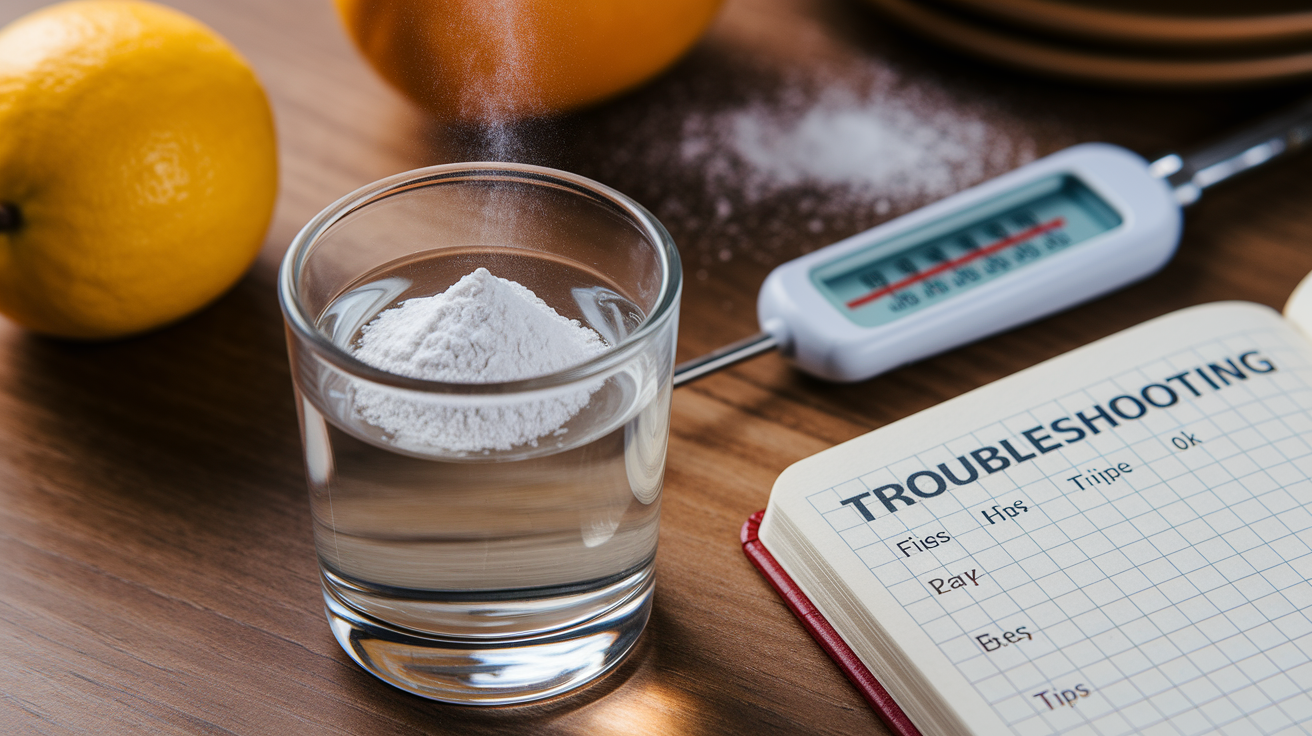
A soupy, runny topping usually means your baking powder’s gone inactive or your oven’s running cooler than the dial says. Baking powder loses its lift over time, so check the expiration date and test it by stirring 1 teaspoon into a few tablespoons of hot water. It should fizz immediately. If your oven runs cool, the batter won’t set properly and the filling will stay watery. Use an oven thermometer to confirm your oven reaches 350°F, and add 5 to 10 extra minutes of bake time if needed.
If you don’t have baking powder, you can substitute by mixing 1/4 teaspoon baking soda with 1/2 teaspoon cream of tartar for every 1 teaspoon of baking powder. Another option’s to use 1/4 teaspoon baking soda and add 1 tablespoon lemon juice to the wet ingredients. Watery filling happens when juicy apples release too much liquid or when you skip the flour or cornstarch. Toss the apples with 1 tablespoon of flour or cornstarch before baking to thicken the juices as they cook.
Pale, undercooked topping means your oven’s too cool or the cobbler needs more time. Move the dish to a higher rack for the last 10 minutes of baking to encourage browning. If the streusel’s browning too fast but the filling’s still not bubbling, cover the top loosely with foil and continue baking until the center bubbles.
Test baking powder freshness by stirring it into hot water. It should fizz right away.
Use an oven thermometer to check your oven’s actual temperature and adjust as needed.
Add 1 tablespoon flour or cornstarch to juicy apples to prevent a watery filling.
Move the dish to a higher rack for the last 10 minutes if the topping’s not browning.
Cover the top with foil if the streusel browns too fast but the filling’s still loose.
Final Words
Pull the cobbler from the oven when the streusel is golden and the filling is bubbling. Let it rest 15 minutes so the juices thicken.
You followed the filling, batter, and streusel steps. Apples, simple batter, and a crumbly cinnamon streusel came together into a cozy dessert.
Serve warm with vanilla ice cream for the best comfort treat: this rustic apple cobbler with cinnamon streusel topping is easy to make and loved by everyone. Go ahead, slice, scoop, and enjoy.
FAQ
Q: What are the exact ingredients and quantities for the full rustic apple cobbler with cinnamon streusel?
A: The full rustic apple cobbler uses 5 apples; 1/2 cup brown sugar; 2 tsp cinnamon; 6 Tbsp butter; 1 tsp vanilla; 1 cup flour; 1/2 cup sugar; 2 tsp baking powder; 3/4 cup milk. Streusel: 1/2 cup brown sugar, 1/2 cup flour, 1/2 tsp cinnamon, 4 Tbsp cold butter crumbled.
Q: What equipment and oven settings do I need and what are the key bake times?
A: You need a 2.5‑quart dish or 13×9 pan and an oven preheated to 350°F. Melt butter about 3 minutes, bake apples 10 minutes, cobbler 40–45 minutes, cool 15 minutes.
Q: How do I assemble the filling, batter, and streusel in simple steps?
A: Assemble by tossing apples with sugar, cinnamon, and vanilla. Melt butter in the dish, bake apples 10 minutes, pour simple batter over apples, sprinkle streusel, bake 40–45 minutes, cool 15 minutes.
Q: Which apples are best and what adjustments should I make for each variety?
A: Use Granny Smith for tartness, Jazz for firmness, Honeycrisp add ~2 Tbsp extra flour, Envy reduce sugar by 1/8 cup. Avoid Macintosh, Gala, and Red Delicious. Slice about 1 inch thick.
Q: How do I prevent a watery or soggy cobbler filling?
A: Prevent a watery filling by pre-baking apples 10 minutes, adding a tablespoon or two of flour or cornstarch to thicken, using firmer apple varieties, and draining excess juices before adding batter.
Q: What flavor customizations work well and how should I adjust sweetness?
A: Flavor up with a cider reduction or add nutmeg, allspice, or ginger. Reduce sugar for naturally sweet apples and add a splash of lemon juice to brighten and balance sweetness.
Q: What streusel variations and techniques change the crumb texture?
A: Streusel changes by adding oats or chopped nuts, using more brown sugar for chew, or using cold butter for coarse crumbs. Food processor makes finer crumbs; hand mixing keeps chunkier pieces.
Q: How do biscuit-style, batter, and streusel toppings compare?
A: Biscuit toppings give a bready, shaggy texture; batter yields more cake-like, tender topping; streusel gives a crunchy, buttery crumble. Choose based on whether you want soft, cakey, or crisp texture.
Q: Cast iron versus baking dish—what adjustments help browning and avoid drips?
A: Cast iron browns more; use same 350°F and watch edges for faster color. Use a flat baking sheet under the dish to catch drips and slightly reduce bake time for very deep pans.
Q: How should I serve the cobbler and what toppings pair best?
A: Serve the cobbler warm after a 15-minute rest with a steamy scoop of vanilla ice cream. Other great toppings: whipped cream, salted caramel drizzle, cinnamon, or a dollop of yogurt.
Q: How far ahead can I make or store the cobbler and how do I reheat it?
A: You can refrigerate prepared filling up to 24 hours. Leftovers keep 3–4 days in the fridge, or freeze up to 3 months. Reheat baked cobbler at 350°F for 10–15 minutes.
Q: What are common cobbler problems and quick fixes?
A: For soupy filling add a thickener and pre-bake apples. For a pale topping, increase oven rack or bake longer. If baking powder failed, replace with baking soda plus cream of tartar.
