

Think a boxed cobbler mix can’t look great on a sheet pan?
Think again.
Scaling a box for a half sheet gives more servings and less fuss.
This guide shows exactly how much fruit, how many boxes, and which pan depth to use.
You’ll get clear ratios, quick prep tips for canned, frozen, or fresh fruit, and simple cues so the topping browns and the filling bubbles but doesn’t run.
No guessing, no soggy bottoms. Just a big, scoopable cobbler that feeds a crowd.
Step-by-Step Sheet Pan Cobbler Mix Instructions (Scaled for Larger Pans)

Making cobbler from a box mix on a sheet pan means more servings, easier assembly, and way less stress when you’re feeding a crowd. A half sheet (12 by 18 inches) is your best bet for a typical weeknight or potluck batch. Shallow one inch deep sheet pans will hold about six cups of fruit total. Deeper two inch pans can handle eight to nine cups without bubbling over the edges. You’ll need one and a half to two times the standard cobbler mix box for a half sheet, depending on how thick you want the topping and how deep your pan runs.
The basic ratio is simple. Plan on about two to three cups of fruit per third of the pan if you’re making multiple flavors. Or spread six to eight cups evenly if you’re sticking with one flavor. Deeper pans prevent overflow and give the bottom crust time to set before the fruit juices soak through. If your pan is shallow, dial back the fruit a little. Use closer to one and a half boxes of mix to keep the topping to fruit balance right.
Always use canned pie filling, drained frozen fruit, or properly thickened fresh fruit. Runny fillings are the main reason sheet pan cobblers turn out soggy or overflow. When you scale up, keep the butter and any liquid ingredients cold. Don’t overmix the topping so it stays light and tender across the larger surface area.
1. Preheat your oven to 375°F and spray or butter your sheet pan, then dust it lightly with flour.
2. In a large bowl, combine your fruit (six to eight cups total for a half sheet) with any extra sugar, lemon juice, or spices you want to add for flavor.
3. If using multiple flavors, mentally divide your sheet pan into equal thirds and spread each fruit mixture into its section, leaving a half inch border around the edges.
4. In a separate bowl, prepare your cobbler mix according to the package, but use about one and a half to two times the amount of mix and liquid called for on the box.
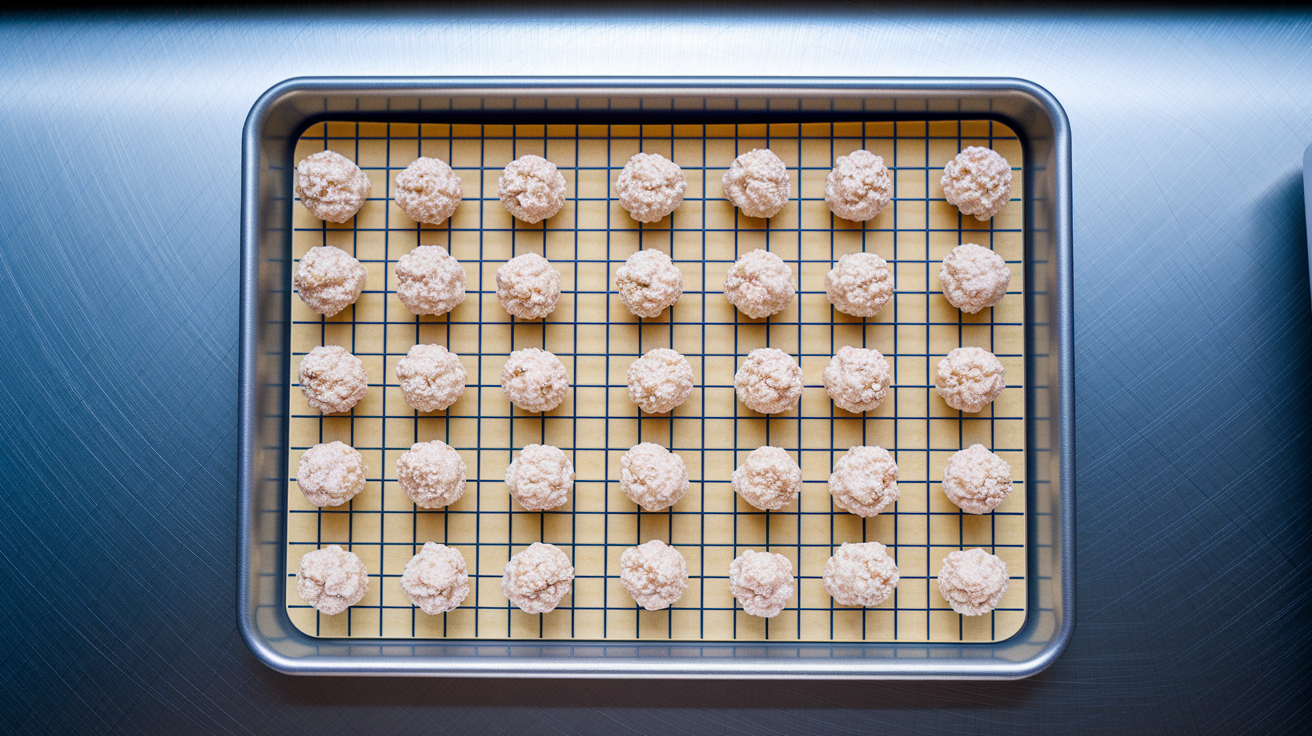
5. For biscuit style topping, form the mixed dough into large, rough chunks by hand and drop them randomly over the fruit, leaving small gaps so steam can escape and fruit peeks through.
6. For streusel or crumble style mix, scatter the topping in loose clumps, not a solid layer, so the fruit bubbles up and caramelizes in spots.
7. Place a sheet of foil on the rack below to catch any drips, then slide your pan onto the center rack and bake for 28 to 32 minutes.
8. Watch for fruit that’s bubbling in the center, not just at the edges, and topping that’s golden with a few deeper brown spots.
Let the cobbler rest on a cooling rack for at least ten minutes before serving so the juices thicken slightly. The topping will firm up as it cools, and the filling will settle into a thick, spoonable consistency instead of running across the pan. Cut into it too soon and you’ll end up with fruit soup and a topping that slides off.
Sheet Pan Sizes, Depths, and Proper Cobbler Mix Scaling

The most common sheet pan for home baking is a half sheet, which measures about 12 by 18 inches. Quarter sheets (9 by 13 inches) work for smaller groups. Full sheets (18 by 26 inches) are rare in home kitchens but perfect if you’re feeding 40 or more. Depth is what really controls how much fruit and topping you can pack in. A standard one inch deep rim limits you to about six cups of fruit total. A two inch deep pan lets you push up to nine or ten cups without risking overflow.
Scaling your cobbler mix depends on both the pan footprint and the depth. A shallow half sheet needs closer to one and a half boxes of mix to get a nice topping layer. A deep half sheet can handle two full boxes and still leave room for fruit to bubble. If you underfill a large pan, the topping spreads too thin and turns crispy instead of biscuit like. Overfill it and the fruit boils over and makes a mess.
| Pan Size | Depth | Ideal Fruit Volume | Cobbler Mix Multiplier |
|---|---|---|---|
| Quarter sheet (9×13) | 2 inches | 4–5 cups | 1× box |
| Half sheet (12×18) | 1 inch | 6 cups | 1.5× box |
| Half sheet (12×18) | 2 inches | 8–9 cups | 2× box |
| Full sheet (18×26) | 2 inches | 14–16 cups | 3× box |
A half sheet pan cobbler typically serves 16 to 24 people, depending on how generous your portions are. A quarter sheet feeds about eight to ten. A full sheet can stretch to 40 servings if you’re slicing smaller squares. Don’t pack the pan to the very top. Leave at least a quarter inch of clearance so the fruit has somewhere to bubble without spilling onto your oven floor.
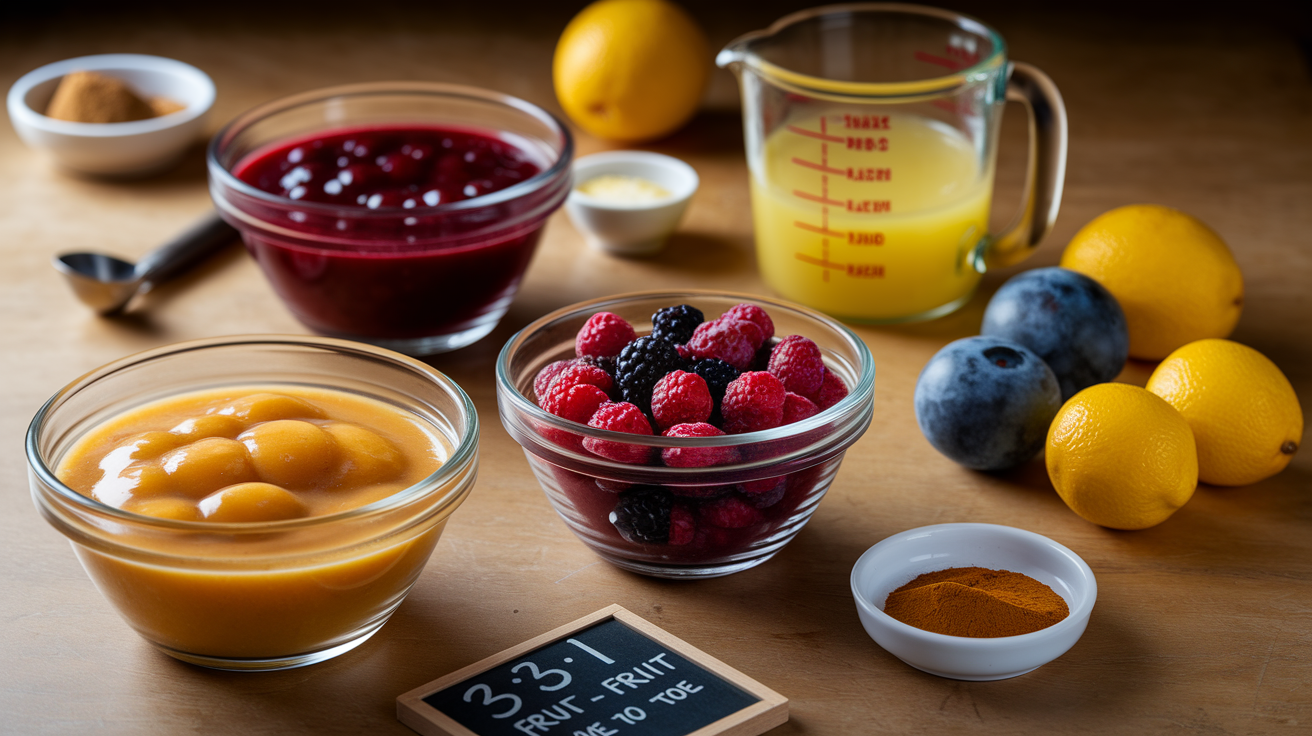
Fruit to Mix Ratios and How to Prep Canned, Frozen, or Fresh Fruit
The standard ratio for sheet pan cobbler is about three parts fruit to one part dry topping ingredients by volume. That means if you’re using eight cups of fruit, you’ll need roughly two to two and a half cups of prepared topping batter or crumble, which usually comes from one and a half to two boxes of standard cobbler mix. Too much topping and the fruit gets buried and steams instead of bubbles. Too little and you end up with a thin, crispy layer that doesn’t feel like real cobbler.
Canned pie filling is the safest choice for beginners because it’s already thickened with cornstarch or tapioca. Fresh fruit releases a lot of juice as it bakes, especially berries and stone fruit, and can turn your sheet pan into a shallow fruit soup if you don’t add enough thickener. Frozen fruit sits somewhere in the middle. It holds less moisture than fresh but more than canned, so you’ll want to toss it with a tablespoon or two of cornstarch or flour before spreading it in the pan.
Canned pie filling gets used straight from the can. Stir in a teaspoon of lemon juice or a pinch of cinnamon for extra flavor. Frozen fruit that’s not thawed needs tossing with two tablespoons of cornstarch per four cups of fruit. Add an extra five minutes to the bake time. Fresh berries get mixed with one and a half tablespoons of cornstarch and two tablespoons of sugar per four cups. Let them sit for ten minutes before spreading. Fresh stone fruit like peaches, plums, or cherries need tossing with two tablespoons of flour or cornstarch and a squeeze of lemon juice per four cups. Apples or pears want two tablespoons of flour, one teaspoon of cinnamon, and a tablespoon of sugar per four cups. Slice thin so they soften in the oven. And avoid mixing fresh and frozen in the same pan. They release moisture at different rates and your topping will bake unevenly.
If you’re new to sheet pan cobbler, stick with canned pie filling. It’s foolproof. You can split the pan into different flavors without worrying about runny spots, and the bake time stays consistent every time.
Proper Layering and Even Distribution on a Sheet Pan
Spread your fruit in an even layer about one to one and a half inches thick across the entire pan, leaving a half inch border around the edges so the juices don’t immediately run over the rim. If you’re doing multiple flavors, divide the pan into equal sections mentally and keep each fruit type in its lane so every serving gets a little variety. Pile moisture heavy fillings like cherry or berry slightly away from the corners, where the pan heats fastest and can scorch thin spots.
Keep the fruit layer uniform in depth. Thick piles in the center will stay raw while the edges burn. Drop topping in chunks with small gaps. Solid coverage traps steam and makes the bottom soggy. Leave the outer half inch of the pan lightly topped or bare to prevent burnt, stuck on edges that are hard to clean. If using multiple flavors, keep them visually distinct. It makes serving easier and looks better on the table.
Even distribution also controls moisture. If one section is packed too deep, the filling will bubble over before the topping sets. If another section is too shallow, the topping will sink and turn dense instead of light. Aim for consistency across the whole sheet, and your cobbler will bake at the same rate from edge to edge.
Achieving the Right Cobbler Texture: Toppings, Mix Consistency, and Add Ins

Biscuit style topping is the most traditional for cobbler mix. You’ll mix the dry ingredients with cold butter or shortening until you have pea sized crumbs, then stir in milk or cream just until it comes together. Drop the dough in rough, uneven chunks over the fruit instead of spreading it smooth. The gaps let steam escape and give you those golden, crispy edges with soft, fluffy centers. If the dough is too wet, the topping will spread into a flat layer and turn gummy. Too dry and it’ll sit on top like hard biscuits and never soften.
Batter style topping is thinner and pours over the fruit like a thick pancake batter. It’s easier to spread evenly across a large pan, but it tends to sink into the fruit a little and create a cake like layer instead of a true cobbler texture. This style works best with firm, thick fillings like apple or pear that won’t release a flood of juice as they bake. If you’re using a box mix that calls for eggs and oil, you’re probably working with a batter style topping.
Streusel or crumble topping is the loosest option. You’ll mix flour, sugar, oats, and cold butter into coarse crumbs and scatter them over the fruit without any liquid to bind them. The result is crunchy, sweet, and almost cookie like. This style is forgiving because you don’t have to worry about overmixing or forming dough. Just sprinkle it evenly and bake.
Overmixing makes any topping tough and dense. Stir just until combined, then stop. Cold butter or shortening is key for flaky texture. Warm fat melts too fast and leaves you with a greasy, flat topping. If the topping isn’t spreading, it’s too dry. Add liquid one tablespoon at a time until it barely holds together. Clumps and uneven coverage are fine. That’s what gives cobbler its rustic, homemade look. Adding a tablespoon of sugar on top before baking creates a sweet, crunchy crust.
Don’t expect the topping to rise much if you’re using a thin batter or a low fat mix. The best texture comes from recipes or mixes that include cold fat and just enough liquid to hold the dough together without making it sticky.
Baking Temperature, Rack Position, and Doneness Cues for Sheet Pan Cobbler
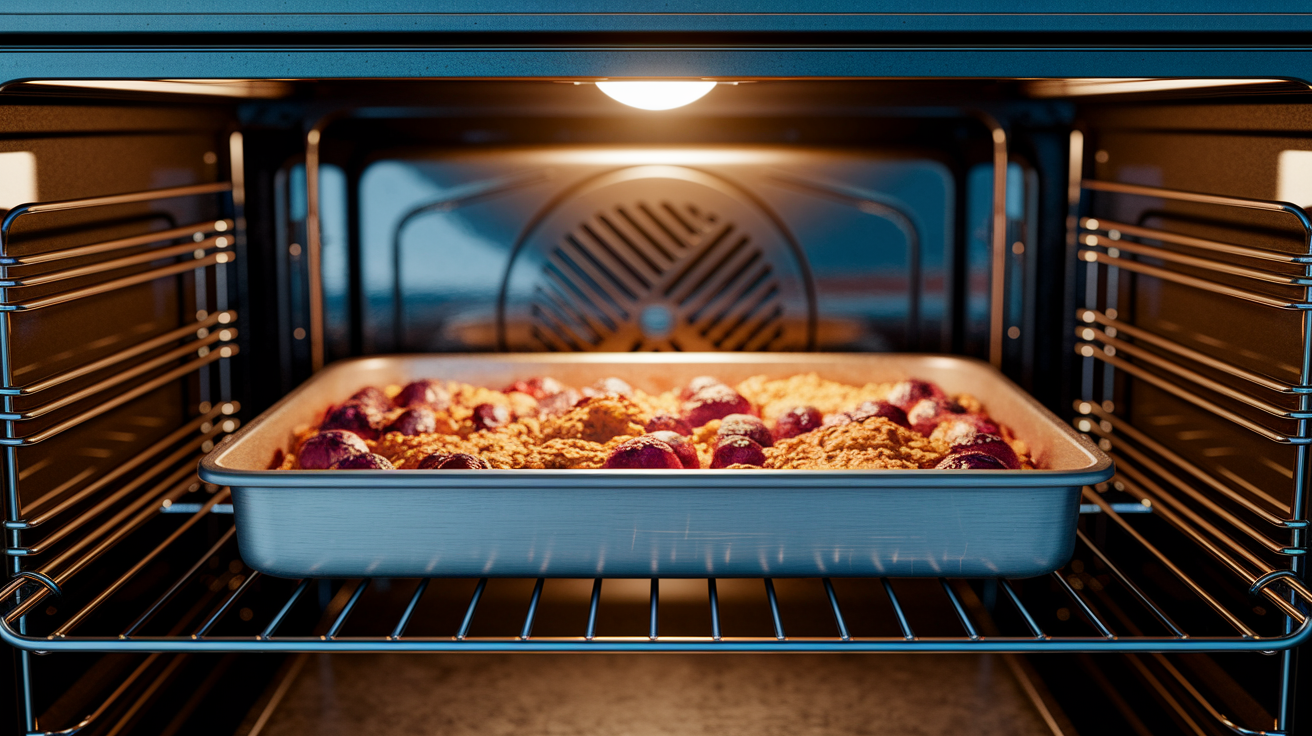
Bake your sheet pan cobbler at 375°F on the center or lower center rack. The center rack gives you the most even heat. The lower rack helps set the bottom crust faster if you’re dealing with a juicy filling. Avoid the top rack. The topping will brown too fast and the fruit will stay cold and raw underneath. If your oven runs hot or you’re using convection, drop the temperature to 350°F and check five minutes early.
Watch for three clear doneness signs. The fruit should be bubbling in the middle of the pan, not just around the edges. The topping should be golden brown with a few darker spots where the chunks are thickest. If you press gently on the topping, it should spring back and feel firm, not wet or doughy. If the topping is browning too fast but the fruit isn’t bubbling yet, tent the pan loosely with foil and add another five to eight minutes of bake time.
| Bake Temp | Time | Rack Position | Doneness Indicator |
|---|---|---|---|
| 375°F (standard) | 28–32 minutes | Center | Fruit bubbling center; topping golden |
| 350°F (convection) | 24–28 minutes | Center | Even browning; fruit simmering |
| 375°F (deep pan) | 32–38 minutes | Lower-center | Bottom crust set; filling thickened |
| 400°F (crispy top) | 22–26 minutes | Center, tent if needed | Deep golden crust; active bubbling |
Storage, Reheating, Freezing, and Transporting Sheet Pan Cobbler

Let your cobbler cool completely before covering it. Warm cobbler creates condensation under the lid, which turns the topping soggy. Once cool, cover the pan tightly with foil or plastic wrap and refrigerate for up to two days. Reheat single servings in the microwave for 30 to 40 seconds, or warm the whole pan in a 300°F oven for 12 to 15 minutes until heated through.
Freezing works best if you plan ahead. Bake the cobbler, let it cool, then wrap the entire pan in two layers of heavy duty foil or transfer portions to airtight containers. Freeze for up to three months. Thaw overnight in the refrigerator, then reheat in a 325°F oven for 20 to 25 minutes. The topping won’t be quite as crisp as fresh baked, but it’ll still taste good and the fruit will hold its texture.
Label your freezer portions with the date and flavor. Frozen cobbler all looks the same after a week. Reheat from frozen if you’re in a hurry. Add ten extra minutes in the oven and cover with foil to prevent burning. Don’t freeze unbaked cobbler. The topping will turn gummy and the fruit will release too much juice as it thaws. For transporting, leave the cobbler in the baking pan and cover tightly with foil. Bring a serving spoon and paper plates. If traveling more than 30 minutes, keep the cobbler in a thermal carrier or cooler to hold the temperature steady.
Final Words
Start by preheating the oven to 375°F, lining a half sheet, and measuring 6–8 cups fruit.
Cut cold butter into pea-size bits for a flaky, spotty topping.
Choose a 2-inch pan to prevent overflow and soggy bottoms, and divide the tray into thirds for even fills.
Bake about 30 minutes until the center bubbles and the top is golden.
The cobbler mix instructions for sheet pan pull pan size, fruit ratios, topping method, and doneness cues into a simple plan so you can serve a steamy, crowd-pleasing dessert.
You’ll love it.
FAQ
Q: What are common cobbler mistakes?
A: Common cobbler mistakes are using fruit that’s too watery, overmixing the topping, not using cold butter, underbaking so the filling stays runny, and choosing the wrong pan depth that causes overflow or soggy bottoms.
Q: How much cake mix for a half sheet pan?
A: The amount of cake mix for a half sheet pan is usually 1.5 to 2 standard boxes (15-16 ounces each), depending on pan depth and whether you want a thicker or thinner cake layer.
Q: Does cobbler batter go on top or bottom?
A: Cobbler batter goes on top of the fruit, so the fruit bakes underneath and bubbles up through gaps, and you should scatter topping chunks so the filling steams and the top turns golden and crisp.
Q: Can I use pancake mix instead of flour in a cobbler?
A: You can use pancake mix instead of flour in a cobbler, but expect a sweeter, denser topping, so reduce added sugar, watch liquid amounts, and bake until the topping is golden and cooked through.
