

A raw center doesn’t mean your cobbler is ruined.
That sinking feeling at the oven is normal, with golden edges and jammy fruit but a doughy middle.
This post gives simple kitchen-ready fixes that actually work.
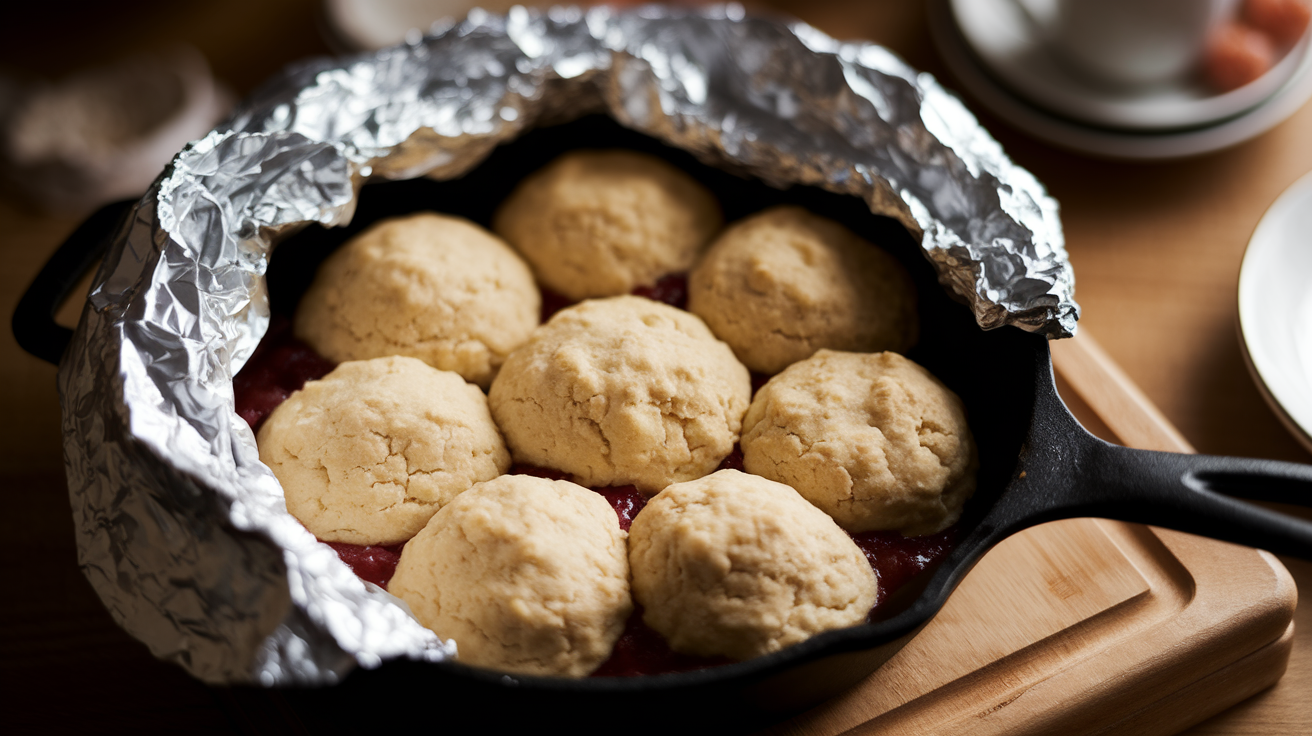
Tent the pan with foil, lower the oven and move it to a lower rack, microwave a tiny spot and crisp it under the broiler, or cut and rebake portions in ramekins.
Follow these quick moves and you’ll serve a steaming, spoonable cobbler with a buttery, set topping.
Immediate Fixes to Rescue a Cobbler Topping That’s Raw in the Center
You pull your cobbler out and the center’s still doughy. Don’t panic, you can fix it.
The fastest move is to tent the whole pan with aluminum foil, shiny side out. This slows down browning on the edges while the center catches up. Drop your oven to 325–350°F and slide the pan back in. Check every 8–10 minutes with a toothpick. You’re looking for moist crumbs, not wet batter. Most cobblers need another 10–30 minutes under the foil to finish.
If your edges are already too dark but the middle’s raw, you need to protect what’s done and push heat where it’s needed. Lower the temp by 25–50°F, wrap foil strips around just the browned rim, and move the pan to a lower rack. The bottom element will push more heat up into the filling and topping. This usually takes 15–30 minutes. Set a timer and peek every 10.
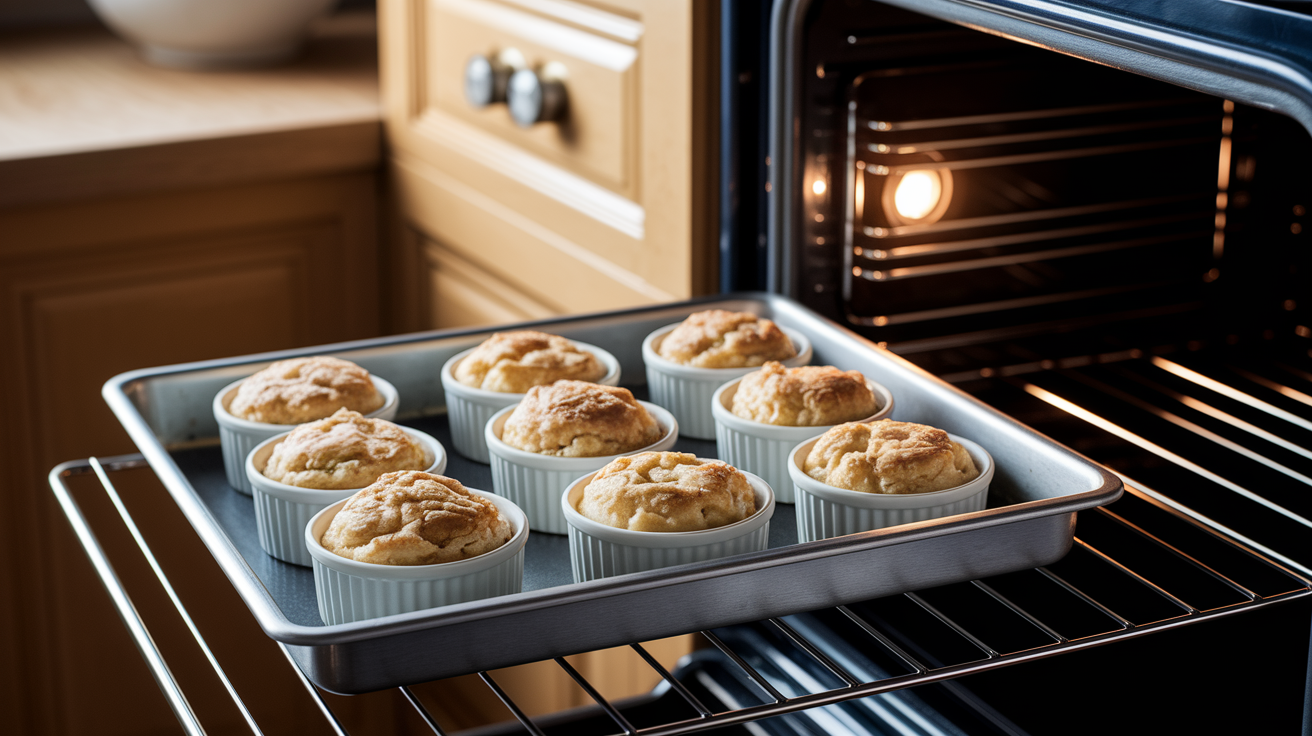
Got a really small raw spot right in the center? Try this: microwave just that middle section for 20–40 seconds to cook the dough through, then hit the whole dish under a hot broiler for 1–2 minutes to crisp the top. Watch it close. Or cut the cobbler into portions, scoop the raw pieces into ramekins, and rebake at 350°F for 15–25 minutes.
Here’s the most reliable full rescue:
- Preheat to 325–350°F while the cobbler sits on the counter.
- Tent the entire pan loosely with foil. Leave a small gap at one edge so steam can escape.
- Move the pan to a lower rack.
- Bake 10–30 minutes, checking every 8–10 with a toothpick in the raw center.
- If the top starts browning too much, add more foil strips over just those spots and keep going.
- Pull it when the toothpick comes out with thick, moist crumbs and the center feels springy instead of jiggly.
Why Cobbler Topping Stays Raw in the Center
Thickness is usually the problem. When your topping’s thicker than 3/4 inch, whether it’s rolled dough or drop biscuits piled close together, the outside sets while the middle stays doughy. Heat takes way longer to reach the center of a thick layer.
Oven temp matters more than you’d think. A lot of home ovens run 25–50°F off from what the dial says. So a recipe at 375°F might actually be baking at 400°F (surface browns too fast) or 325°F (center never finishes). Pan size throws people off too. Use a smaller dish than the recipe calls for and your topping layer gets deeper. That can add 10–30 minutes with zero warning.
Moisture from the fruit and cold ingredients slow everything down. If your filling isn’t thickened or bubbling hot before the topping goes on, it’s releasing steam the whole time. That keeps the bottom of the topping wet and doughy. Cold dough straight from the fridge or an ice-cold filling? The inside temp of the whole dish stays lower longer, delaying when the center actually sets.
Here’s what causes a raw center most often:
- Topping thicker than 3/4 inch
- Oven running 25–50°F off from the setting
- Pan smaller or deeper than the recipe, making the topping layer thicker
- Filling not thickened or cooked down first
- Cold dough or filling dropping the starting temp
Troubleshooting Why Your Cobbler Needs a Rescue (Without Repeating Steps)

The fixes in the first section work because they tackle heat, time, and moisture all at once. Lowering the temp slows surface browning, giving the center extra minutes without burning the edges. Moving the pan lower shifts the heat source closer to the filling and bottom of the topping. The middle cooks faster than the top can over-brown. Foil traps just enough heat to keep things moving while reflecting intense heat away from what’s already done.
Which fix you pick depends on what the cobbler looks like right now. Edges golden but center raw and pale? More time at the same temp or slightly lower, with foil. Edges too dark and center still wet? Drop the temp 25–50°F, cover the dark spots, move lower. Whole topping pale and center raw? It’s just underbaked. More time at the original temp. Tiny doughy spot in the very center but everything else done? Microwave and broiler, or cut and rebake in ramekins so the rest doesn’t dry out.
Use these to figure out which rescue from Section 1 fits:
- Edges golden, center raw and pale: tent with foil, 325–350°F, bake 10–30 minutes, check every 8–10.
- Edges over-browned, center raw: lower temp 25–50°F, cover dark areas, move to lower rack, bake 15–30 minutes.
- Whole topping pale and center raw: bake longer at original temp (or 350°F), check every 8–12 minutes.
- Tiny raw spot in center only: microwave 20–40 seconds, then broil 1–2 minutes, or cut and rebake that portion in a ramekin.
How to Test Whether Your Cobbler Topping Is Fully Cooked

The toothpick test is fastest and most reliable. Stick a toothpick or thin skewer straight into the thickest part of the topping, pull it out, and look at what’s on it. You want moist crumbs or a few sticky fruit bits. Not raw, wet batter. If it comes out coated in glossy, pale dough, the center’s still raw.
Want more certainty? Use an instant-read thermometer. Poke the probe into the center of the dough layer, not down into the fruit. Biscuit and dough toppings are done when they hit 190–205°F. That’s where starches set and the raw flour taste disappears. Below 190°F means it’s underbaked, even if it looks golden on top.
Visual cues and texture help too. The surface should be golden brown with some deeper brown spots. Filling should be bubbling at the edges and ideally in the center. Press the center lightly with your fingertip. It should feel springy and firm. Not jiggly, soft, or gummy. If the top looks shiny or wet instead of matte, it needs more time.
Here are the four main tests:
- Toothpick test: moist crumbs, not raw batter
- Internal temp: 190–205°F in the center
- Visual check: golden brown surface, bubbling filling at edges and center
- Texture test: center springy and firm when pressed, not jiggly or glossy
Oven Temperature, Pan Size, and Rack Placement When Fixing Raw Cobbler Centers

Oven accuracy matters because a 25–50°F swing changes how fast the top browns versus how fast the center cooks. Oven runs hot? Surface sets and browns before the middle has time to bake. Runs cool? Whole thing bakes too slowly, filling can bubble over or dry out before the topping finishes. Get an oven thermometer, stick it on the center rack for 15–20 minutes during preheat, and you’ll see the real temp. Adjust the dial to hit what the recipe actually needs.
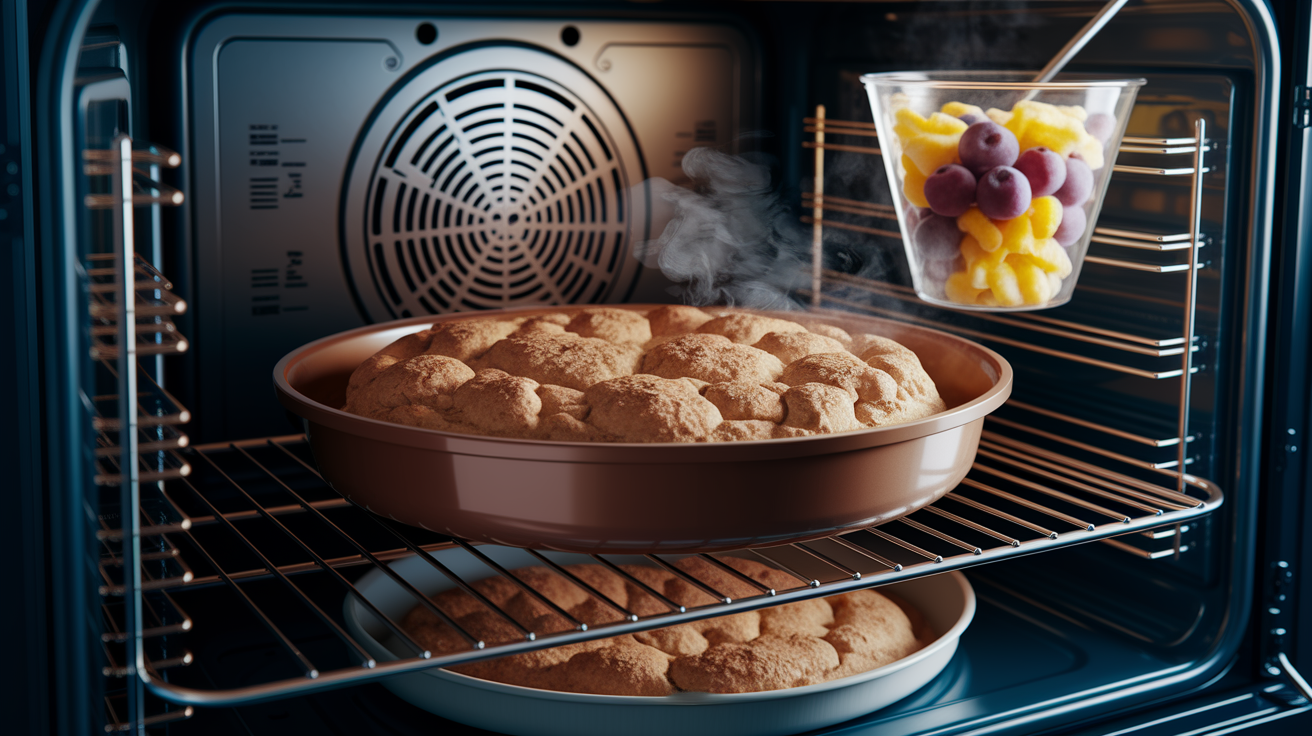
Pan size and material change how heat moves through the cobbler. Smaller or deeper pan than the recipe calls for makes the topping layer thicker, which can add 10–30 minutes. Glass pans heat slower and hold heat longer than metal. They often need an extra 5–10 minutes and 25°F lower to avoid over-browning. Dark metal pans absorb heat faster and brown the bottom and edges harder. They might finish the center faster but risk burning the edges if you’re not watching.
Rack placement controls which part gets the most direct heat. Center rack is standard for even baking. But if the center’s staying raw while the edges brown, move the pan to a lower rack. Brings it closer to the bottom element, pushes more heat up through the filling into the middle. Top browning too fast? Move up one rack to cut direct heat from the top element.
| Pan Type | Effect on Bake Time | Notes |
|---|---|---|
| Glass (Pyrex, ceramic) | Add 5–10 minutes; lower temp by 25°F | Heats slowly, retains heat, browns edges gently |
| Light metal (aluminum) | Use recipe time as written | Even heating, moderate browning |
| Dark metal (nonstick, anodized) | Reduce time by 5 minutes or lower temp by 25°F | Absorbs heat fast, browns bottom and edges quickly |
| Smaller/deeper than recipe | Add 10–30 minutes | Thicker topping layer takes longer to cook through center |
Adjusting Cobbler Topping Thickness and Batter Consistency to Prevent Raw Centers
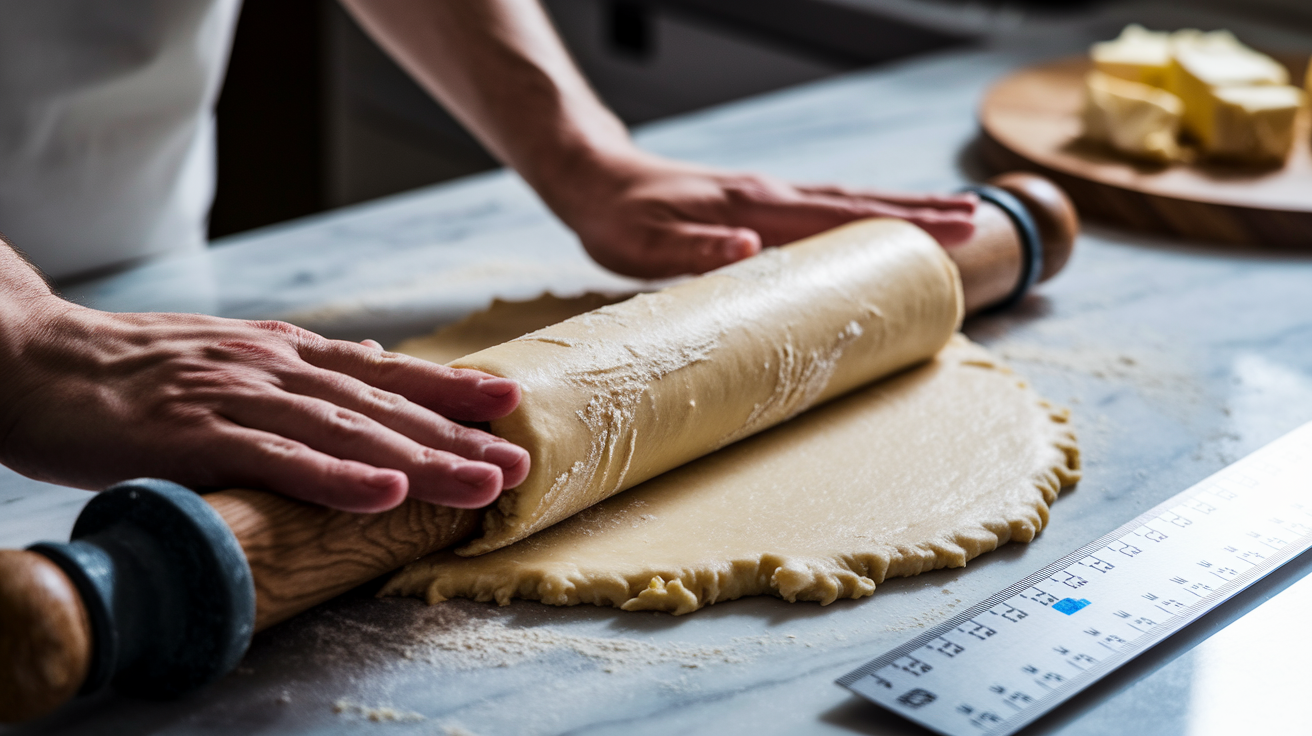
Topping thickness is the single biggest thing you can control. Roll or press dough to 1/4–1/2 inch thick for single-layer cobblers. Keep drop biscuit dollops about 1/2 inch high with 1–2 inches between them. When topping’s thicker than 3/4 inch, the outside sets while the inside stays doughy. Heat can’t penetrate fast enough. Love a thick, fluffy topping? Plan to add 15–30 minutes and tent with foil partway through.
Batter consistency affects how the center cooks. Topping dough should be thick enough to hold its shape when scooped or rolled. Not thin and pourable. Too wet and it spreads into a thick, uneven layer that traps moisture and takes way longer to set. Too dry and it forms a dense, heavy blanket that resists browning and stays gummy in the middle. Properly mixed cobbler topping looks shaggy and slightly sticky, with visible lumps of butter that create pockets of steam and structure as they bake.
Six tips to get it right:
- Roll or press dough to 1/4–1/2 inch thick
- Keep drop biscuits about 1/2 inch high, spaced 1–2 inches apart
- Don’t go thicker than 3/4 inch unless you’re adding 15–30 minutes
- Mix just until combined, leave small butter lumps visible
- Don’t overmix, makes the dough dense and slow to cook
- Too wet? Add 1–2 tablespoons flour. Too dry? Add 1 tablespoon milk at a time
How Fruit Moisture and Thickener Choices Affect Cobbler Topping Doneness

Excess moisture from the filling is one of the main reasons topping stays raw and gummy in the center. When filling’s very juicy or not thickened before baking, it releases steam the whole time. Keeps the bottom and middle of the topping wet. Steam condenses on the underside of the dough, stopping it from setting and browning. Even after an hour, the center can still be pale and doughy. Cut the liquid in the filling before you add the topping and you’ll see a huge difference.
Cooking the fruit for 5–10 minutes on the stovetop before topping it is the most effective move. Sauté the fruit with sugar and butter in a skillet, then simmer uncovered to evaporate excess juice and concentrate flavor. You’ll see the liquid reduce and thicken. Fruit starts to caramelize a little. Once it’s thick and bubbling, transfer to your baking dish and add the topping right away. Hot filling also helps the topping bake faster and more evenly because the center starts at a higher temp.
Cornstarch is the best thickener because it thickens around 203°F, well below the doneness temp for the topping, and it makes a clear, glossy sauce instead of a cloudy, starchy one. Use about 1 tablespoon cornstarch per 1 cup of fruit, mixed with a little cold water or lemon juice before stirring into the cooked filling. Don’t use plain flour as your only thickener. It needs more liquid and can leave a raw flour taste in the center. Cut fruit into slices no thicker than 1/2 inch so the filling cooks evenly and releases moisture at a steady rate instead of flooding the topping with juice halfway through.
| Fruit Type | Moisture Level | Thickener Adjustment |
|---|---|---|
| Peaches, nectarines (ripe) | High | Use 1 tablespoon cornstarch per cup; cook filling 5–10 minutes to reduce juice |
| Berries (strawberries, blueberries) | Very high | Use 1–1.5 tablespoons cornstarch per cup; macerate briefly then drain or cook down |
| Apples, pears | Moderate | Use 1/2–1 tablespoon cornstarch per cup; slice thin and cook 5 minutes if very juicy |
| Cherries (pitted) | High | Use 1 tablespoon cornstarch per cup; simmer 5 minutes to release and reduce juice |
| Frozen fruit (thawed) | Very high (releases liquid when thawed) | Thaw, drain well, pat dry; use 1–1.5 tablespoons cornstarch per cup and cook filling first |
Special Situations: Frozen Fruit, Deep Dishes, and Convection Oven Fixes
Baking with frozen fruit takes extra time because frozen fruit dumps a ton of liquid as it thaws and cooks. Add frozen fruit straight to the dish without thawing and the topping starts baking while the fruit’s still ice cold. Lowers the internal temp of the whole thing and delays when the center can set. Thaw frozen fruit completely, drain the excess liquid, pat it dry with paper towels before mixing with sugar and thickener. Must use frozen fruit straight from the freezer? Add 10–20 minutes and expect the topping to take longer to brown and cook through in the center.
Deep baking dishes trap steam and moisture under the topping. Slows down cooking, keeps the bottom and center wet and gummy. A shallow, wide dish spreads the filling into a thinner layer that heats faster and releases steam easier. Topping bakes more evenly, center finishes same time as the edges. Only have a deep dish? Cut back on how much topping you use or plan to add 10–20 minutes. Tent with foil partway through to stop over-browning on top.
Convection ovens speed up browning because the fan circulates hot air constantly. Can cook the top and edges faster than the center. Using convection for cobbler? Drop the temp by 25°F from the recipe and check doneness 5–10 minutes earlier. Topping browning too fast but center’s still raw? Switch to conventional bake mode if you can, or tent with foil and finish without the fan.
Reheating, Salvaging, or Repurposing Cobbler with a Raw Center
Found the raw center after it’s already cooled? Reheat it in the oven at 325°F until the center hits 190–205°F. Cover loosely with foil to stop more browning on the surface. Check internal temp with an instant-read thermometer every 10–15 minutes. Works well for cobblers that are only slightly undercooked in the center. Usually takes 20–40 minutes depending on how cold it is and how thick the topping.
Microwaving individual portions cooks the raw center fast, but it won’t brown or crisp the topping. Need a quick fix for one serving? Microwave the portion 20–40 seconds to finish the dough, then slide it under a hot broiler for 1–2 minutes to add browning and a little crispness. Watch close. Broiler can burn the surface in seconds.
When the center’s very raw or the topping has serious problems, cutting the cobbler into portions and rebaking the raw pieces in individual ramekins is the most reliable save. Scoop the raw portions into 6–8 ounce oven-safe dishes, put them on a baking sheet, and bake at 350°F for 15–25 minutes until the topping’s set and golden. Smaller portions cook way faster and more evenly than trying to rescue the whole thing. Cobbler beyond saving? Remove the filling, simmer it briefly to thicken into a compote, serve warm over ice cream or pancakes while you bake a fresh batch of topping separately for next time.
Five salvage options:
- Reheat the whole dish covered at 325°F for 20–40 minutes, check internal temp every 10–15 minutes
- Microwave individual portions 20–40 seconds to cook the center, then broil 1–2 minutes to brown
- Cut raw portions into ramekins, rebake at 350°F for 15–25 minutes
- Remove the topping, bake it separately on a sheet at 350°F for 8–12 minutes, return crisp pieces to warm filling
- Simmer the filling into a thick compote and serve over ice cream if the topping’s unsalvageable
Final Words
Tent the cobbler with foil and bake longer, checking every 8 to 10 minutes. If edges brown, lower the oven 25 to 50°F or move the dish to the lower rack. Use the broiler 1 to 2 minutes to color the top, or finish single portions in microwave then crisp briefly under broiler.
Remember why this happens: thick topping, wet filling, cold dough, or oven variance. Test with a toothpick or aim for 190 to 205°F.
For ‘cobbler topping raw in center how to fix’, follow these steps and you’ll pull a warm, jammy dessert everyone will love.
FAQ
Q: How to fix runny cobbler? Will cobbler thicken as it cools?
A: Fix a runny cobbler by baking longer at 325-350°F, tenting with foil if edges brown, or reheating portions; it will thicken somewhat as it cools, but don’t rely on cooling alone.
Q: Why is my cobbler doughy? What are some common mistakes to avoid when making cobblers?
A: A doughy cobbler usually comes from topping that’s too thick, underbaking, cold filling, or excess fruit juice. Avoid thick dollops, underbaking, skipping thickeners, and uneven oven temps to prevent doughy centers.
