

Think soggy cobbler bottoms are just bad luck?
They’re not.
Most of the time it’s a few fixable steps, like too much juice, too little thickener, a slow-heating pan, or baking on the wrong rack, that turn warm, jammy fruit into a wet mess under your topping.
In this post you’ll learn simple, testable fixes including how to prep and macerate fruit, which thickener and amounts to use, what pan and oven tricks work, and quick checks to know when it’s truly done.
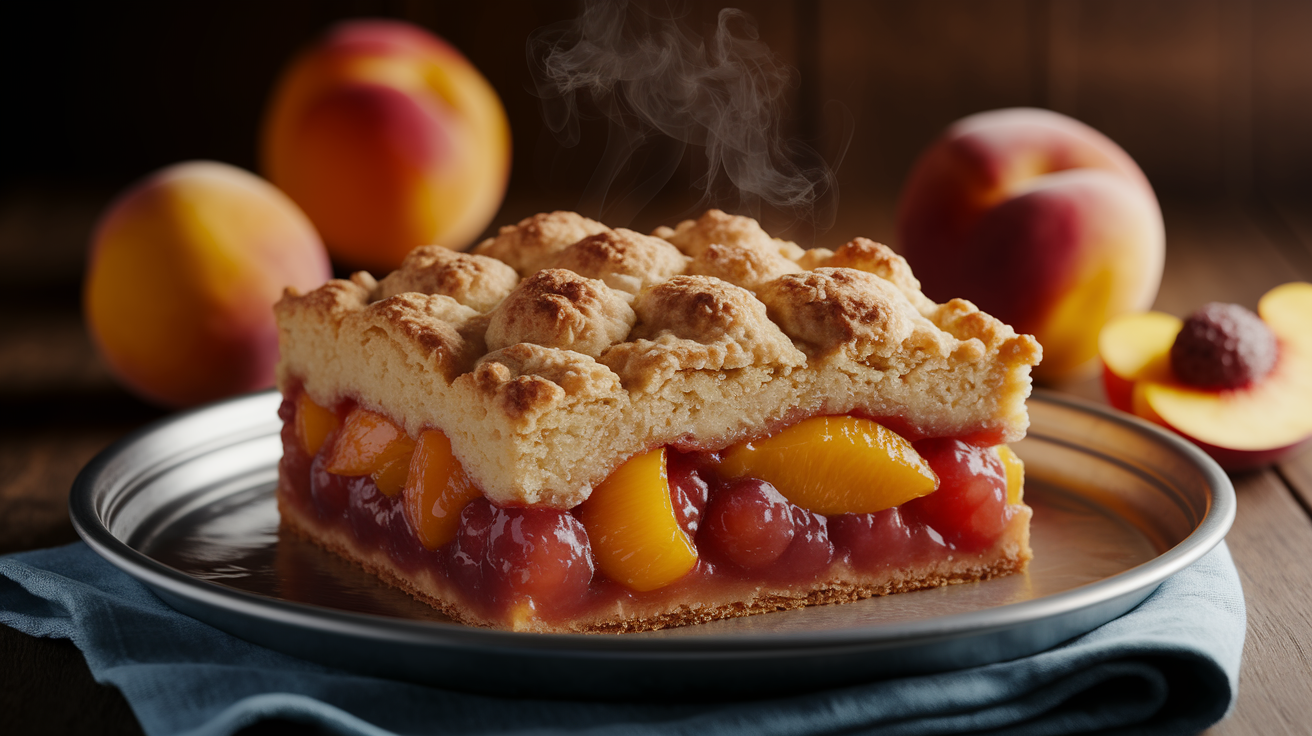
Follow these and you’ll get a buttery-crisp top and no more soggy bottoms.
Key Reasons Cobbler Bottoms Get Soggy and How to Fix Them Fast
Your cobbler bottom turns into a wet mess when fruit releases more juice than the topping and filling can handle during baking. Fresh peaches, berries, rhubarb, they all shed liquid as they heat up. If that juice has nowhere to go or nothing to thicken it, it pools under your topping and soaks straight through. Shallow dishes let steam escape. Deep ceramic bowls trap moisture and keep bottoms soggy.
Temperature matters more than most people realize. If your oven runs too cool or you bake on the top rack, the fruit bubbles away while the bottom never gets hot enough to set. The topping floats on liquid instead of baking into a firm layer that resists juice. Glass and ceramic dishes hold heat differently than metal, so the material you choose changes how fast your cobbler firms up.
Thickener is the simplest fix most home bakers skip or under-measure. Cornstarch, tapioca, flour, they all grab onto fruit juice and turn it into a thick, glossy filling instead of a thin puddle. Without enough thickener or the wrong kind, even a perfect topping will sink and turn gummy because it’s sitting in fruit soup instead of jammy fruit.
Here are the fastest ways to stop sogginess before it starts:
- Pre-cook your fruit on the stove for 5 to 8 minutes to evaporate excess juice before it ever hits the oven.
- Add 2 to 3 tablespoons of cornstarch per 4 cups of fruit and mix it directly into the fruit before topping.
- Use a shallow 9×13-inch metal pan or a cast-iron skillet instead of a deep ceramic dish.
- Bake at 375°F to 400°F on the lower-middle rack so the bottom gets direct heat and the top sets fast.
- Make your topping thick enough to scoop, not pour, so it stays above the fruit instead of sinking in.
- Let macerated fruit drain for 10 minutes and dump that collected juice before assembling your cobbler.
Focus on fruit prep, the right thickener amount, and a hot oven on a lower rack. Those three steps handle most soggy-bottom problems without changing your recipe or adding complicated steps. If your fruit is very juicy, strawberries or thawed frozen peaches for example, increase your cornstarch by one tablespoon and consider a quick stovetop simmer before baking.
Preparing Fruit Properly to Avoid Excess Moisture

Fruit preparation is where sogginess starts or stops. Wash and dry your fruit completely before slicing. Surface water dilutes your filling and adds unnecessary liquid. Cut fruit into uniform pieces about one inch thick so they release juice at the same rate and cook evenly. Berries can go in whole, but large strawberries should be halved or quartered.
Maceration pulls juice out of fruit before baking. Sounds counterintuitive, right? But it actually helps you control moisture. Toss sliced peaches or berries with sugar and let them sit for 20 to 30 minutes. The sugar draws out liquid, and you can drain it off and discard it or save it for a syrup. Don’t pour that drained juice back into your cobbler.
Here’s how to manage fruit moisture step by step:
- Macerate with 1/4 to 1/2 cup sugar per 4 cups of fruit, then drain for 10 to 15 minutes in a colander.
- Mix your thickener directly into the drained fruit so every piece gets coated and the starch activates evenly as it heats.
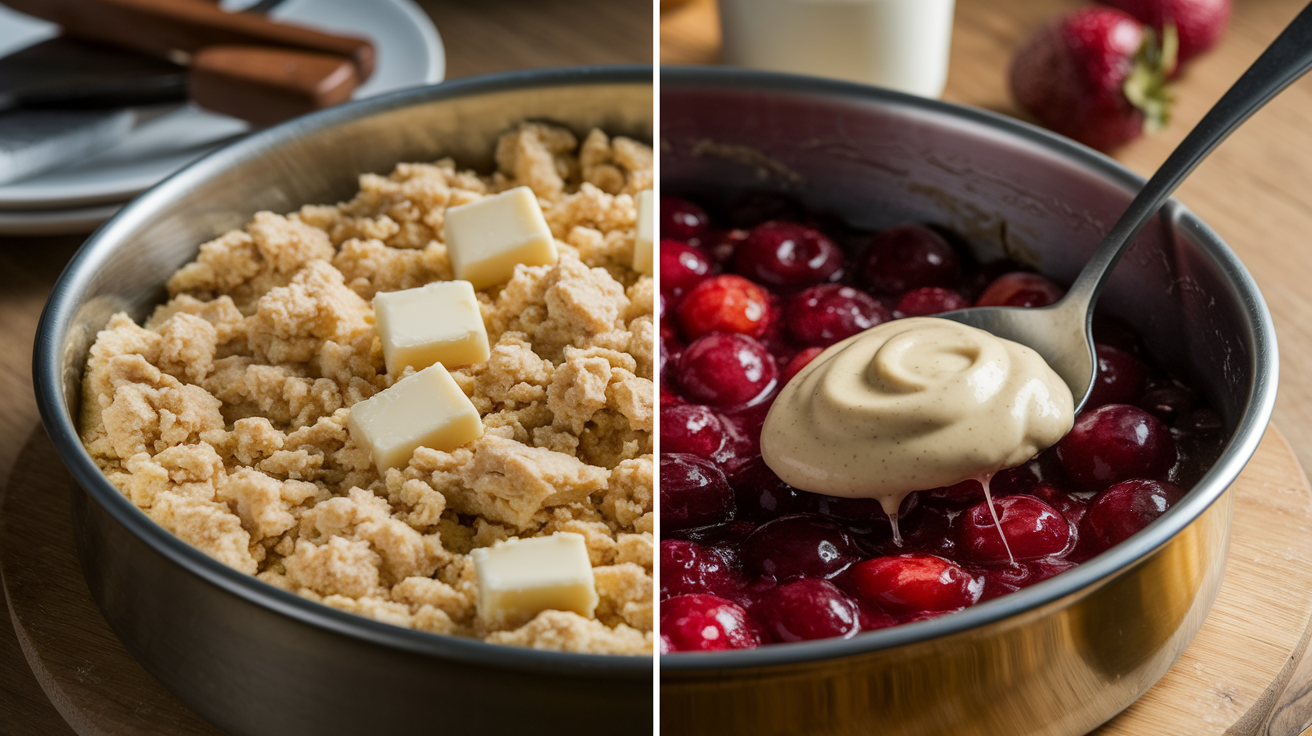
- Pre-cook very juicy fruit in a skillet for 3 to 8 minutes with butter and sugar until the liquid reduces and thickens, then cool slightly before topping.
- Toss frozen fruit straight from the bag with an extra tablespoon of cornstarch without thawing to prevent a watery mess.
Different fruits need different thickener amounts because their water content varies. Peaches and apples hold their shape well and need about 1.5 to 2 tablespoons of cornstarch per 4 cups of fruit. Berries, strawberries, rhubarb? Much juicier. They need 2 to 3 tablespoons of cornstarch or 2 to 3 tablespoons of quick-cook tapioca per 4 cups. Frozen fruit releases even more liquid as it thaws in the oven, so bump your thickener up by 50 percent. Use 3 to 4 tablespoons of cornstarch per 4 cups of frozen fruit.
Getting the Topping Consistency Right
Topping texture controls how much juice it absorbs and how crisp it stays. A thick, scoopable topping sits on top of the fruit and bakes into a firm layer that juice can’t penetrate. A thin, pourable batter sinks into the fruit and soaks up liquid like a sponge, turning gummy instead of golden.
Biscuit-Style Toppings
Biscuit toppings stay crisp when you use cold butter and mix just until combined. Cut 6 tablespoons of cold butter into 2 cups of flour, 1 tablespoon of baking powder, 1/2 teaspoon of salt, and 1/4 cup of sugar until the mixture looks like coarse crumbs. Stir in 3/4 cup of cold milk until you have a thick, shaggy dough that barely holds together. Drop spoonfuls on top of the fruit instead of spreading a smooth layer. This lets steam escape between the biscuits and the bottom gets direct oven heat.
Batter-Style Toppings
Batter toppings should be thick enough that they resist sliding off a spoon. If your batter pours like pancake batter, it’ll sink straight into the fruit and turn soggy. Add a little more flour, one tablespoon at a time, until the consistency feels closer to thick cake batter. Dollop it over the fruit in spoonfuls rather than pouring it in one big puddle.
Biscuit toppings generally stay crisper than batter toppings because they sit higher above the fruit and have less surface area touching the juices. Batter spreads and makes contact with more liquid, so it absorbs more moisture and gets softer. If you love a cake-like topping, just know you’ll need to increase your thickener and bake a few minutes longer to compensate for the extra absorption.
Choosing the Right Baking Dish and Rack Position
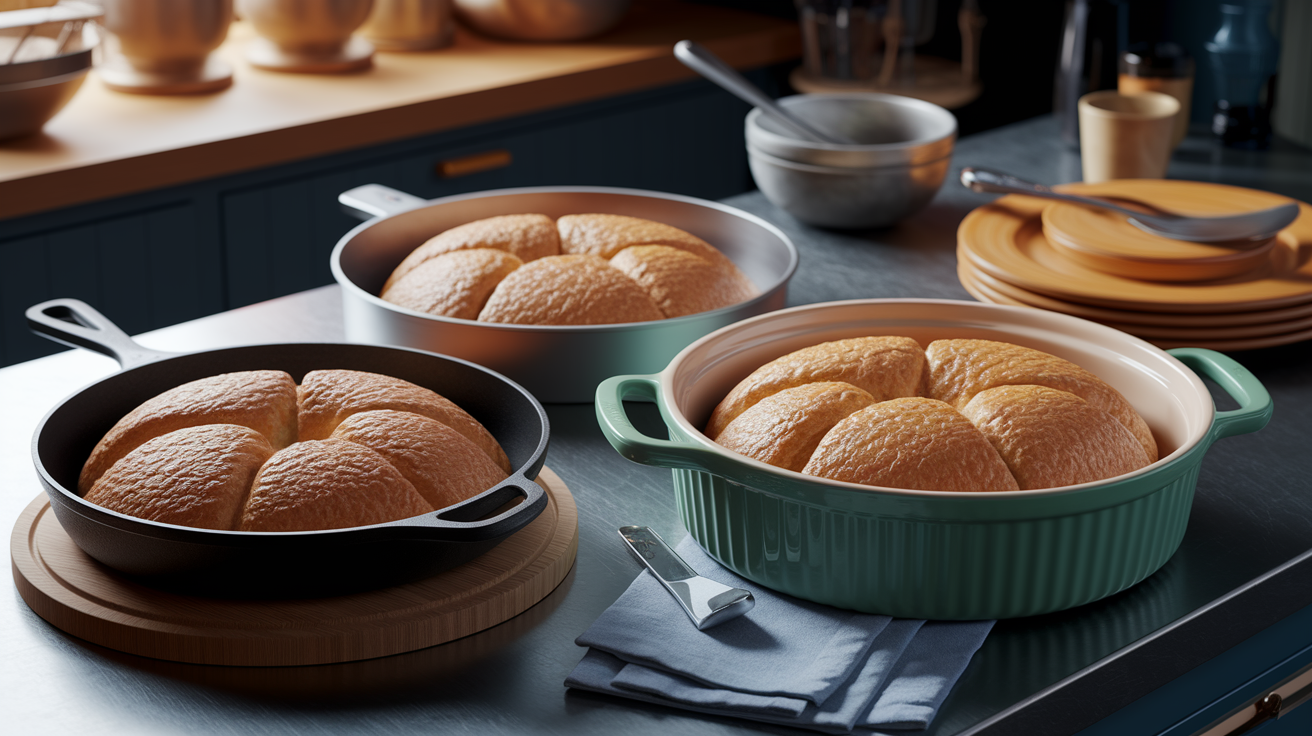
Metal pans heat up fast and transfer heat to the cobbler bottom better than ceramic or glass. A 9-inch cast-iron skillet or a shallow 8×8-inch or 9×13-inch metal baking pan gives you the best chance at a firm, non-soggy bottom. Metal conducts oven heat directly to the fruit and topping. Ceramic and glass dishes hold heat longer but heat up slowly, so your fruit bubbles for a long time before the bottom ever gets hot enough to set. That extra bubbling time means more juice and more sogginess.
Dish depth matters just as much as material. Keep your fruit layer about 1 to 1.5 inches deep so juices can evaporate and the filling can thicken without pooling. Deep casserole dishes trap steam and liquid at the bottom. By the time the top is golden, the bottom is swimming. A shallow pan spreads fruit out in a thin layer that bakes evenly and lets excess moisture escape as steam instead of soaking into the topping.
Rack position changes how heat hits your cobbler. Place your dish on the lower-middle or lower third rack so the bottom gets strong, direct heat from the oven floor. Baking on the top rack browns the topping fast but leaves the bottom pale and wet because the fruit never gets hot enough to bubble and thicken. Preheating a heavy baking sheet on the lower rack for 10 minutes, then setting your cobbler dish on that hot sheet? That boosts bottom heat even more and helps the filling set faster.
Knowing When a Cobbler Is Fully Done
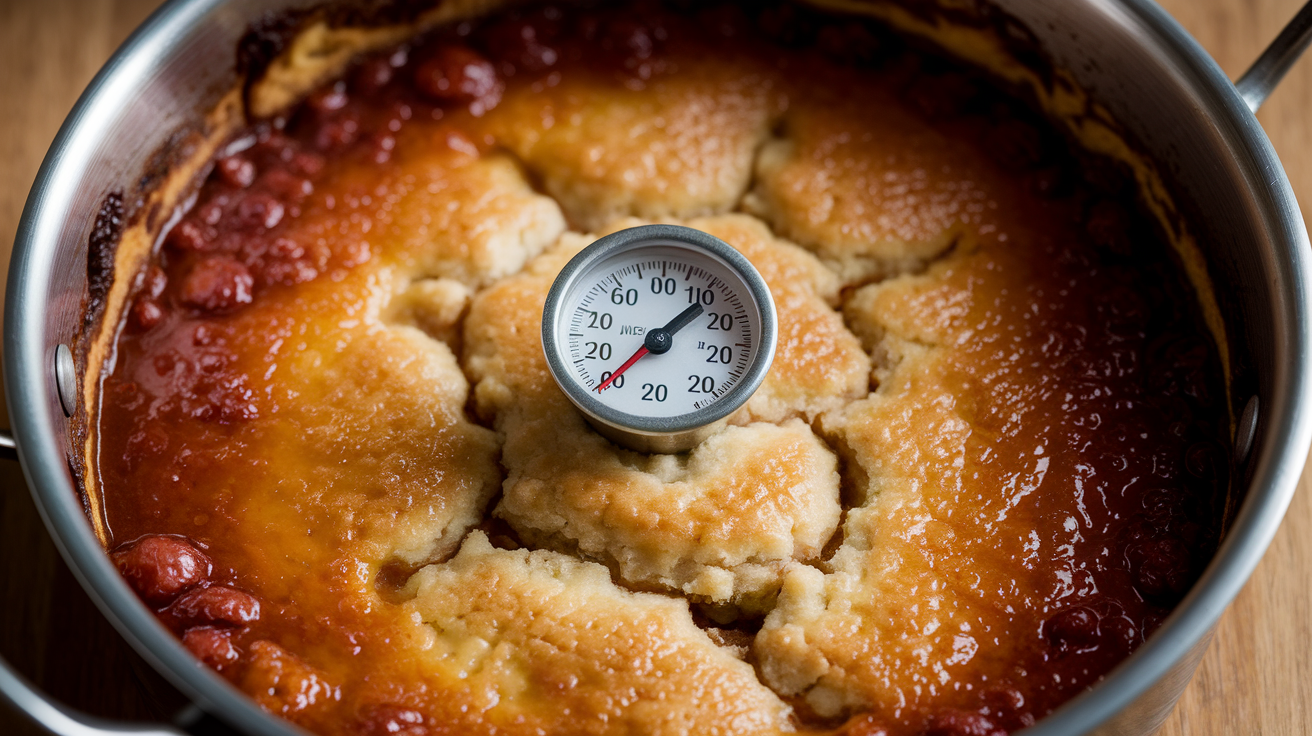
Visual cues tell you more than the timer does. Your cobbler’s done when thick, glossy juices bubble at the edges and in the center for at least one to two minutes. Thin, watery bubbles mean the filling hasn’t thickened yet and needs more time. The topping should be golden brown with a few deeper brown spots, and it should spring back when you touch it lightly with a fingertip instead of leaving a wet dent.
Internal temperature is the most reliable doneness test. Insert an instant-read thermometer into the center of the filling, avoiding the topping. The filling should reach 200°F to ensure the fruit has released its juice, the thickener has activated, and everything has cooked long enough to set. Anything cooler than that means the starches haven’t done their job yet, and your cobbler will be runny when you scoop it.
Quick doneness indicators to check before pulling your cobbler out:
- Juices bubble thick and slow, not thin and fast, for a full minute or two.
- The topping is firm to the touch and golden brown all over, not pale or doughy in the center.
- A thin spatula slides under an edge cleanly without a puddle of juice running out.
Troubleshooting Common Cobbler Problems

Berries release a lot of water and need more thickener than firm fruits. For 4 cups of blueberries, blackberries, or strawberries, use 2 to 3 tablespoons of cornstarch and consider a quick stovetop simmer for 3 to 5 minutes before baking. Mix the cornstarch with 1 to 2 tablespoons of cold water first to make a slurry, then stir it into the hot fruit so it doesn’t clump. If your berry cobbler still turns out wet, increase the cornstarch by one tablespoon next time and bake on a preheated sheet on the lower rack.
Peaches have a different problem because they go from firm to mushy fast. Macerate sliced peaches with 1/4 cup of sugar for 20 to 30 minutes, then drain off the liquid completely. Use 1.5 to 2 tablespoons of cornstarch per 4 cups of drained peaches and consider pre-cooking them in a skillet with butter for 5 to 8 minutes until the juices reduce and thicken into a glaze. Peaches also benefit from a two-stage bake. Start at 400°F for 10 minutes to set the topping fast, then drop to 350°F for 25 to 35 more minutes so the fruit cooks through without turning to mush.
Frozen fruit is convenient but tricky because it sheds extra liquid as it thaws in the oven. Don’t thaw frozen fruit before using it. Toss it straight from the freezer with 3 to 4 tablespoons of cornstarch per 4 cups and add 1 to 2 extra tablespoons of sugar to balance the dilution. Bake 5 to 10 minutes longer than you would for fresh fruit and watch for thick, glossy bubbles that hold their shape instead of thin, watery ones.
Fruit-specific quick fixes:
- Berries and rhubarb: Use 3 tablespoons of cornstarch per 4 cups and pre-cook for 3 to 5 minutes on the stovetop.
- Peaches and apricots: Macerate and drain, then use 2 tablespoons of cornstarch and consider a skillet reduction.
- Apples and pears: Use 1.5 tablespoons of cornstarch per 4 cups because they hold less water naturally.
- Frozen mixed fruit: Increase thickener to 3 to 4 tablespoons and bake 10 minutes longer than the recipe states.
Final Words
Bubbling edges and a soft middle? You’ve got quick, practical fixes: prep the fruit (macerate, drain, or pre-cook), stir in a little cornstarch, use a shallow metal dish, and bake hot so the topping sets. Adjust topping thickness so it doesn’t sink into the filling.
Watch for thick, syrupy bubbles and a golden, firm top as your doneness cues. Tweak for berries, peaches, or frozen fruit.
Use these simple steps to learn how to prevent soggy cobbler bottom and enjoy a steamy, crowd-pleasing dessert tonight.
FAQ
Q: How do you keep cobblers from being soggy?
A: To keep cobblers from being soggy, prevent excess juice and help the topping set: pre-cook or macerate and drain fruit, add cornstarch, use a shallow metal pan, and bake at 375–400°F.
Q: How do I stop my pastry from going soggy on the bottom and why is my cobbler crust soggy?
A: To stop a soggy bottom and fix a soggy crust, improve bottom heat and reduce wetness: place the pan lower in the oven, use metal or a shallower dish, add a thickener, and don’t underbake.
Q: What to do if your cobbler is too wet?
A: If your cobbler is too wet, keep baking until the filling bubbles and the topping is golden, let it rest to thicken, or simmer excess juices on the stove to reduce and spoon back.
